Integrating 'Sign in with Apple' in iOS apps
The WWDC 2019 gave us many features to look forward. One of the most exciting features and my favorite is the ‘Sign In with Apple’ feature in iOS 13. The users can sign in securely, and their privacy is guaranteed. Apple is holding up their biggest promise of privacy with this feature. It is available for web and other platforms as well. We will be exploring and learning the integration of ‘Sign In with Apple’ on different platforms in the upcoming articles. Now, let us get started with how we can integrate it into our iOS app.

Requirements
- Xcode 11 (in beta at the time of writing the article)
- Apple developer account.
Steps to integrate ‘Sign In with Apple’
Before getting started, you have to configure ‘Sign in with Apple’ in the developer portal. If you don’t know how to configure ‘Sign in with Apple’, don’t worry, we have got you covered. Head to this article to know about it.
Alright, let’s get started!
Adding ‘Sign In with Apple’ in capabilities
-
Create a new project in Xcode.
-
Head to Signing and capabilities tab and hit the ‘+ Capability’ option and select ‘Sign In with Apple.’ It will look like this,

Setting up the ‘Sign In with Apple’ button
-
Navigate to the class where you want to set up the ‘Sign in with Apple’ button. I have built a SignInHandler class which encapsulates all the sign-in code and logic.
-
Import the framework ‘AuthenticationServices’ in your class.
-
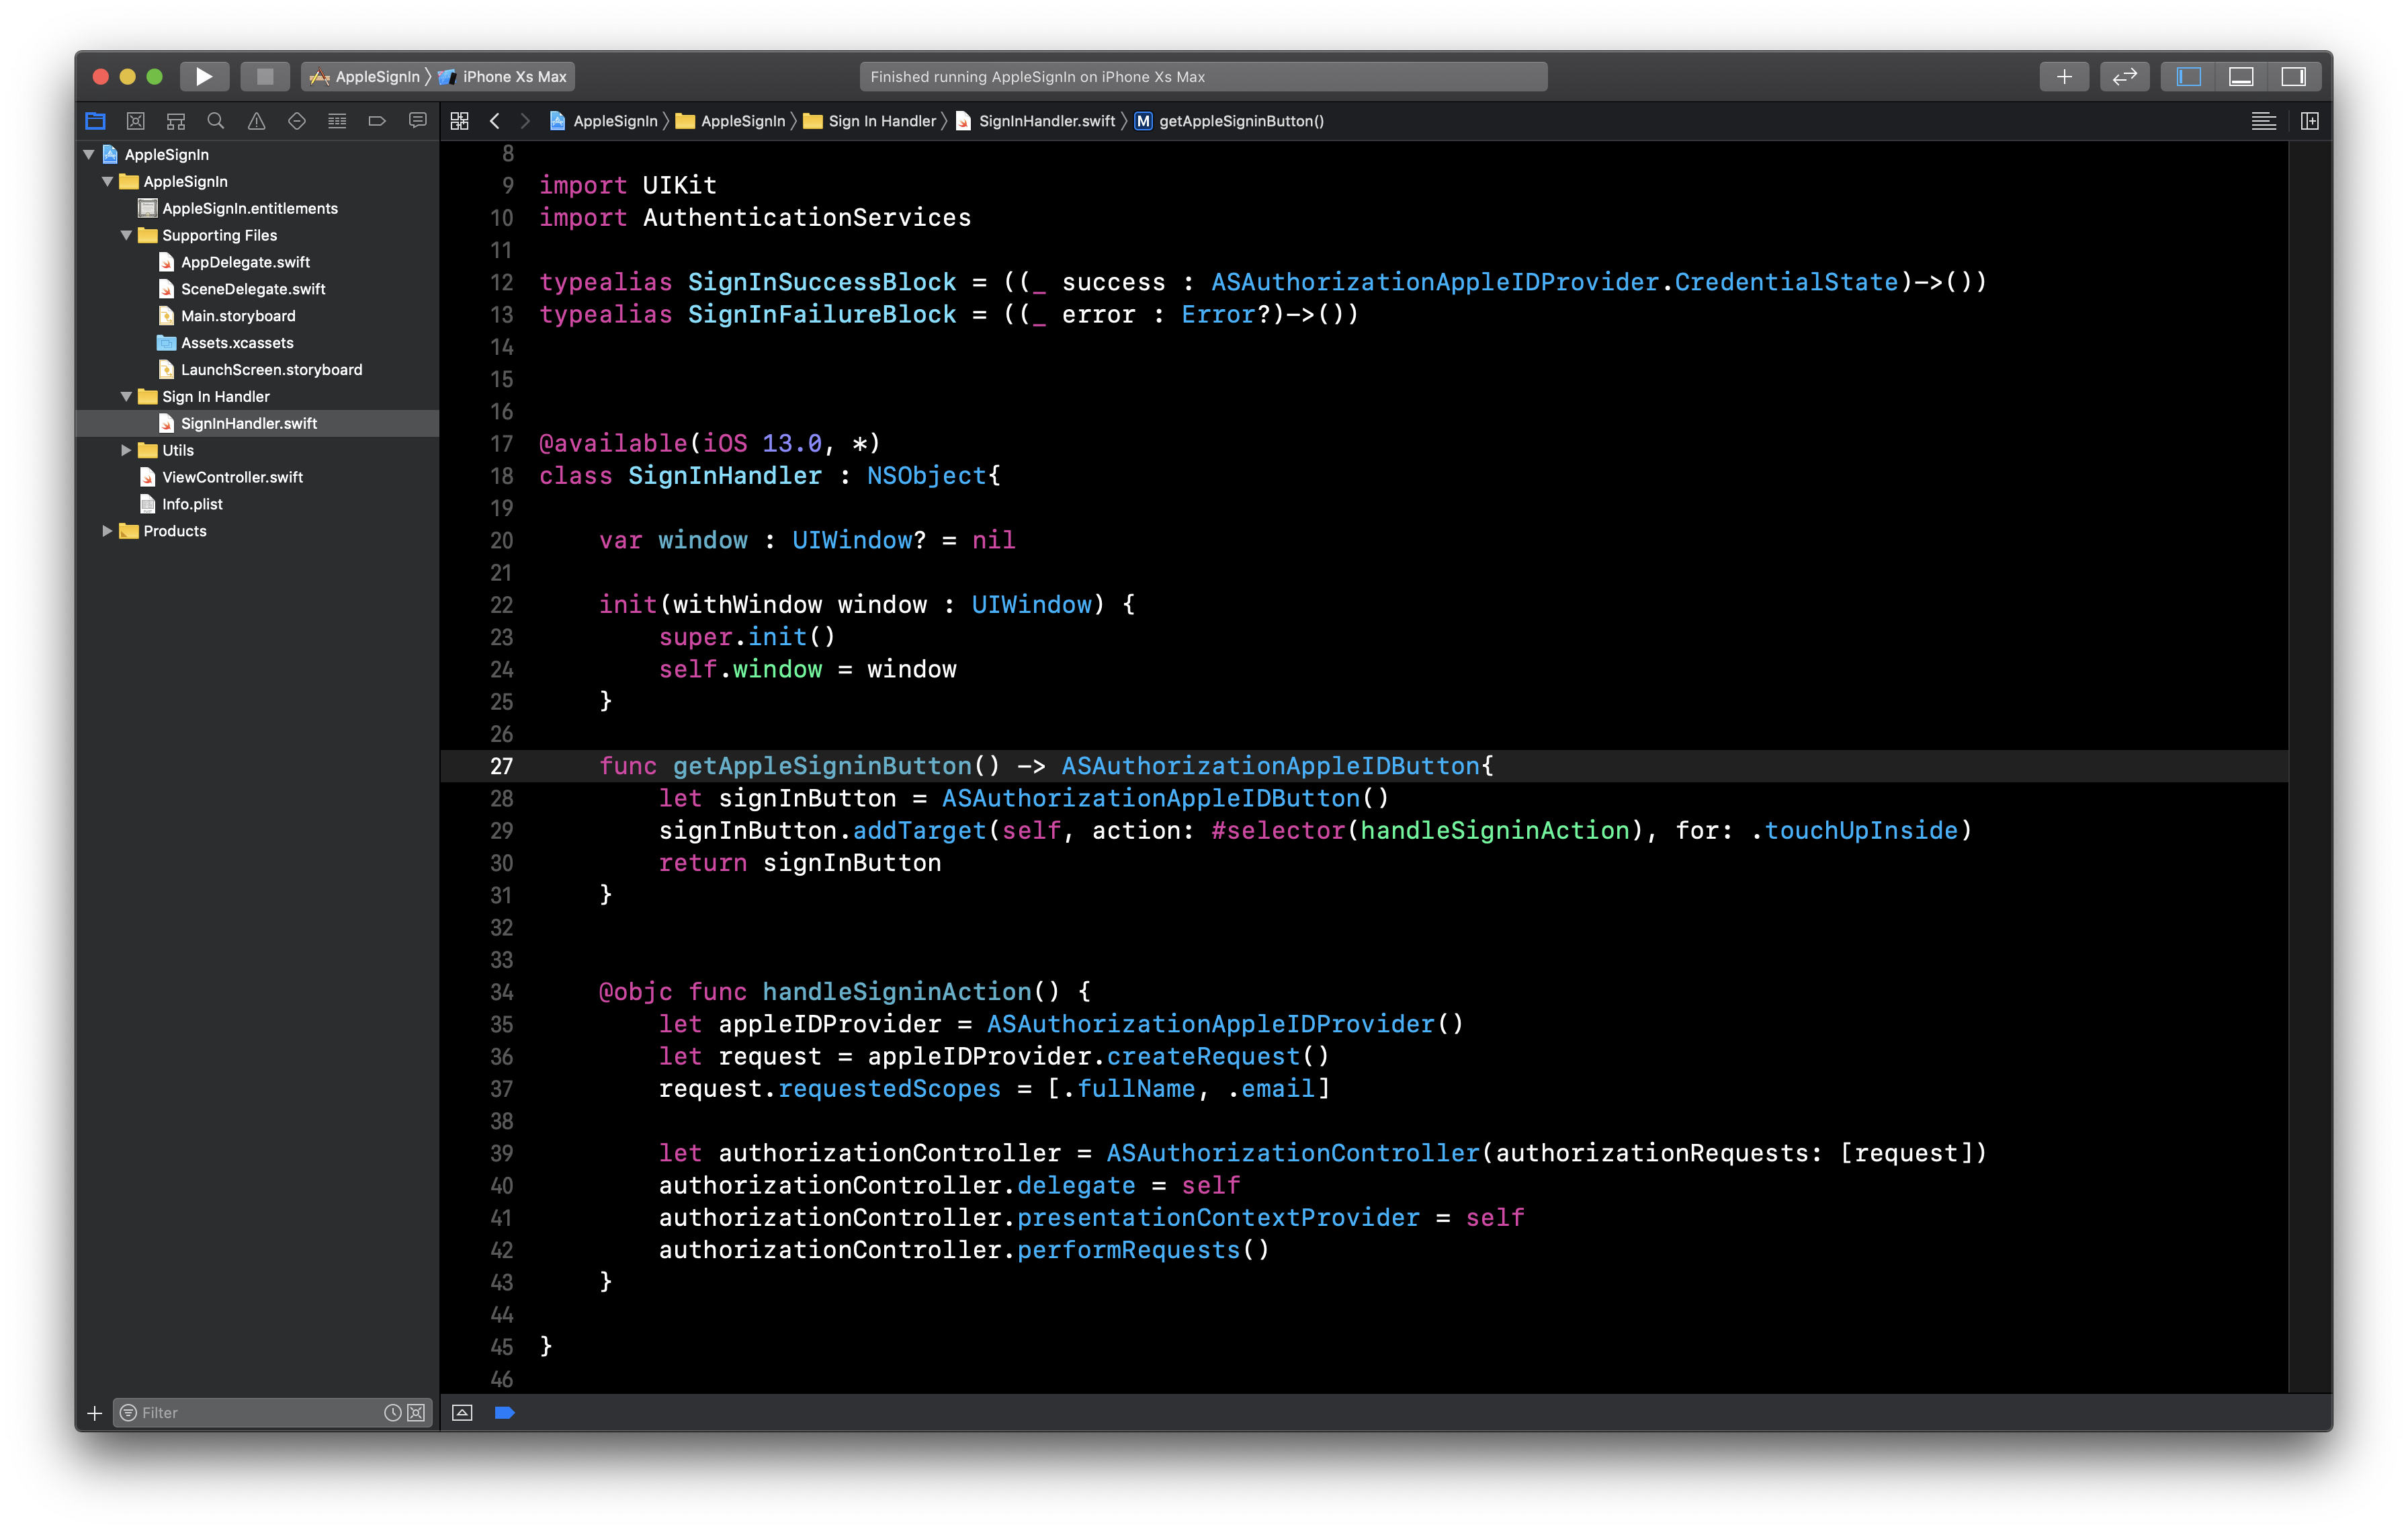
Create an instance of ASAuthorizationAppleIDButton class and define its targets and selectors.
//Code to create an instance of the 'Sign In with Apple' button
@available(iOS 13.0, *)
func getAppleSigninButton() -> ASAuthorizationAppleIDButton{
    let signInButton = ASAuthorizationAppleIDButton()
    signInButton.addTarget(self, action: #selector(handleSigninAction), for: .touchUpInside)
    return signInButton
}
Now, we have to write the implementation for handleSigninAction.
@available(iOS 13.0, *)
@objc func handleSigninAction() {
// 1
    let appleIDProvider = ASAuthorizationAppleIDProvider()
    let request = appleIDProvider.createRequest()

//2
    request.requestedScopes = [.fullName, .email]

//3
    let authorizationController = ASAuthorizationController(authorizationRequests: [request])
    authorizationController.delegate = self
    authorizationController.presentationContextProvider = self
    authorizationController.performRequests()
}
Here is the breakdown of the above given code snippet,
-
We are using an instance of ASAuthorizationAppleIDProvider inorder to create a request.
-
We need only the full name and email of the user. Hence, we have mentioned them in the ‘requestedScopes.’
-
Finally, we pass the request to the ASAuthorizationController.
Handling the success/failure scenarios after sign in
On tapping the ‘Sign in’ button, ‘handleSigninAction’ method is triggered, and the ASAuthorizationController is presented, which prompts the user to use Apple sign-in.
There are two scenarios after presenting the ASAuthorizationController. Either the user successfully signs in, or an error occurs. The delegates, ‘didCompleteWithAuthorization’ or ‘didCompleteWithError’ get callbacks for the success or failure scenarios, respectively.
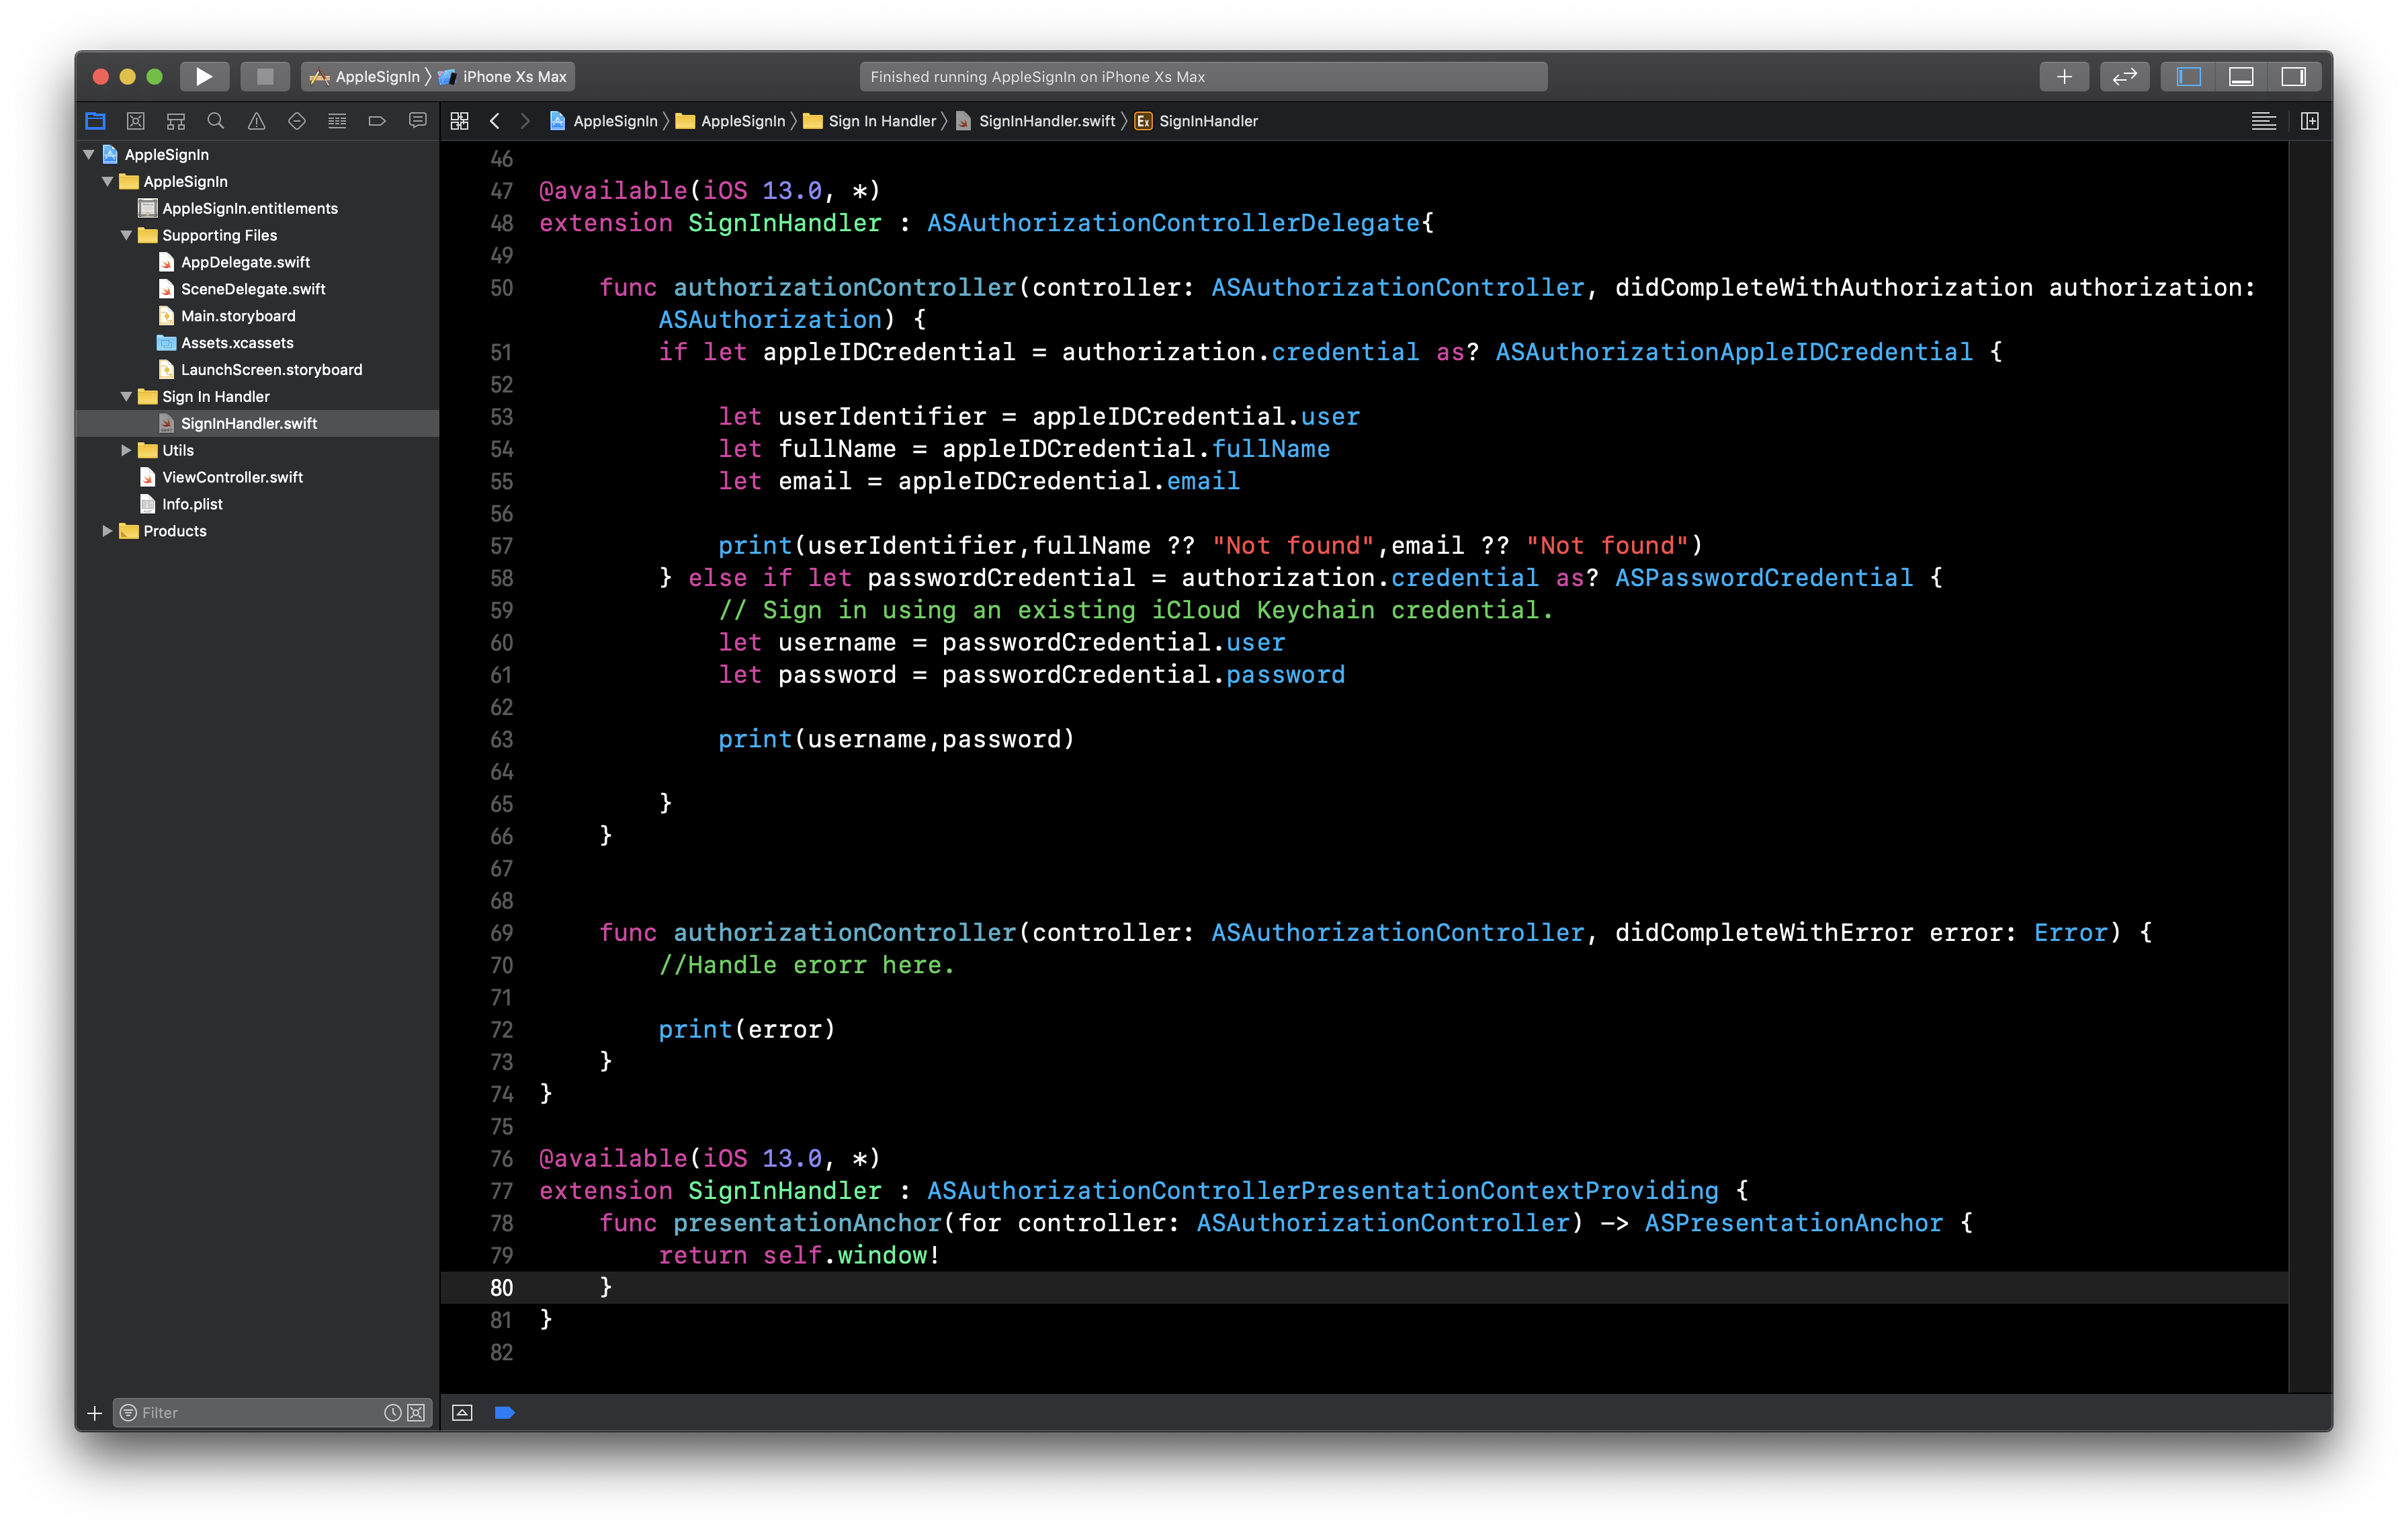
We will write an extension to SignInHandler class and conform it to ‘ASAuthorizationControllerDelegate.’
-
If the user successfully logs in, the user’s details such as full name, email id. etc can be extracted from ‘ASAuthorizationAppleIDCredential’ in the ‘didCompleteWithAuthorization’ method.
-
If any error occurs during the login process, it should be handled in ‘didCompleteWithError’ method.
@available(iOS 13.0, *)
extension SignInHandler : ASAuthorizationControllerDelegate{

    func authorizationController(controller: ASAuthorizationController, didCompleteWithAuthorization authorization: ASAuthorization) {
        if let appleIDCredential = authorization.credential as? ASAuthorizationAppleIDCredential {

            let userIdentifier = appleIDCredential.user
            let fullName = appleIDCredential.fullName
            let email = appleIDCredential.email

            print(userIdentifier,fullName ?? "Not found",email ?? "Not found")
        }
    }


    func authorizationController(controller: ASAuthorizationController, didCompleteWithError error: Error) {
        //Handle error here.
        print(error)
    }
}
There is an another delegate called as ‘ASAuthorizationControllerPresentationContextProviding’. It is not required to implement this delegate, but it is highly recommended to implement it.
All we have to do is provide the current window.
func presentationAnchor(for controller: ASAuthorizationController) -> ASPresentationAnchor {
    return view.window ?? UIWindow()
}
Integrating the ‘Sign in with Apple’ button in a ViewController
Now that we have our Sign in button, we can implement it in a ViewController and see it in action.
-
Create an instance of the ‘SignInHandler’ class and use the ‘getAppleSigninButton()’ to generate the button. Add the button to a view and setup the constraints. Embed the sign-in button in a UIStackView for easy setup.
-
Run the project, and you can see the sign-in button in action. Tap the button, and it will present you an authentication view.
That’s it you have successfully implemented ‘Sign in with Apple’ in your iOS app.
You can download the completed project from here
You can always reach out to me on Twitter and feel free to share your thoughts in the comments below.
Like our articles? Support us!